

Casio AE-1200 "Royale" Filter Mod: Step-by-Step Guide (Updated 2026)
The Casio AE-1200 (Casio Royale) filter mod places a colored gel filter behind the faceplate to transform the look of the stock LCD. It takes about 30 minutes, requires only a small Phillips screwdriver, double-sided tape, and a filter kit (about $12), and is fully reversible. The two things that separate a clean mod from a messy one: use tape instead of glue, and be obsessive about dust removal before you reassemble.
By Luke, founder of JellyLab Watches. I make watch modding videos for 150,000 followers on YouTube and share builds on Instagram. I've completed literally thousands of mods, close to 4,000 at this point, for customers in over 48 countries, and this guide is everything I know about the AE1200 filter mod. Updated September 2026.
At a glance:
| Time required | About 30 minutes for a first mod |
| Difficulty | Beginner. No soldering, no glue, four screws. |
| Cost | Base watch + $12 gel filter kit |
| Reversible? | Yes, gel filters held with tape come right back out |
Watch the full mod, then follow the written steps below:
What You'll Need
Choose your base watch
There are four main AE1200 variants that you will see:
- Black w/ Black Rubber Band (Model: AE1200WH-1A), Amazon Link
- Gold w/ Black Rubber Band (Model: AE-1200WH-5AVCF), Amazon Link
- Silver w/ Black Rubber Band (Model: AE-1200WH-1CVCF), Amazon Link
- Silver w/ Stainless Steel Band (Model: AE1200WHD-1A), Amazon Link
There are a few other variants as well, but these are the most common. The mod process below is identical no matter which variant you pick.
Prefer to skip the DIY entirely? I sell finished custom Royales built with the exact process below.
Must-have tools
- Small Phillips head screwdriver
- Double-sided tape - a lot of people use super glue; it is messy, hard to reverse, and unforgiving. Double-sided tape will serve you much better for this job. Specifically, I use normal Scotch double-sided tape.
- Scissors - I prefer micro scissors like these, but any scissors will do
Nice-to-have tools
- Tweezers - I like this tweezer set from iFixIt
- Dust removal putty - I wouldn't skip this. It is the single best tool for removing dust from inside of the watch, and trust me, I have tried a lot. Bergeon 6033-1 Rodico Green is what I use.
- Gloves - like these, important for avoiding fingerprints
- A small tray - for loose screws
- A soft cloth - for setting the watch down on. I use these microfibers, but really most things will work
- Strong light source
Choose your filters: gel vs adhesive
You have a couple of options here: gel filters or adhesive-backed filters. My preference is gel filters, and after thousands of mods it isn't close. Here is the honest comparison:
| Gel filters | Adhesive-backed filters | |
|---|---|---|
| Clarity | Excellent | Adhesive layer can affect clarity |
| Dust cleanup | Easy, putty lifts dust right off | Dust that lands on adhesive is stuck |
| Reversibility | Fully reversible in minutes | Difficult to remove cleanly |
| Placement | Forgiving, can reposition | One shot to get it right |
For the purpose of this guide I will assume you are using a gel filter.
I sell gel filter kits for the AE1200 (self plug). The filters are 1-inch by 1-inch and change the color of the entire screen; solid color kits come with three filters, gradient kits with two. Any of the filters are easy to cut to various sizes with a household pair of scissors if you only want to use them for certain windows or customize the look. They're verified on the AE1200, AE1300 and AE1600, and customers have used them in a wide variety of other Casio watches. On other models you may need to trim the 1-inch filter to fit the display window. I tested over 10 different gel filter providers and these are the highest quality I have found. The Sunset gradient is my bestseller, and among the solid colors the favorites are red and blue.
Can't decide on colors? Try your build before you buy. My Custom Royale Builder lets you pick a case, band, a filter color for each window, and a decal, and shows a live mockup of the finished watch. It's how you order a fully built Royale from me, but it's just as useful if you're doing the mod yourself: play with combinations, copy the link to your build, then grab the matching parts.
One important difference: the Sunset gradient filter ships without a protective film. It uses a different printing process than the solid color filters and is intended to be inserted directly into the watch. If you're installing a Sunset, skip the film-peeling instructions in Step 8.
How to Do the AE1200 Filter Mod (11 Steps)
Step 1: Remove the watch from the packaging
Leave the circular protective glass cover on at this point. Flip the watch over and lay it face down on your soft cloth.
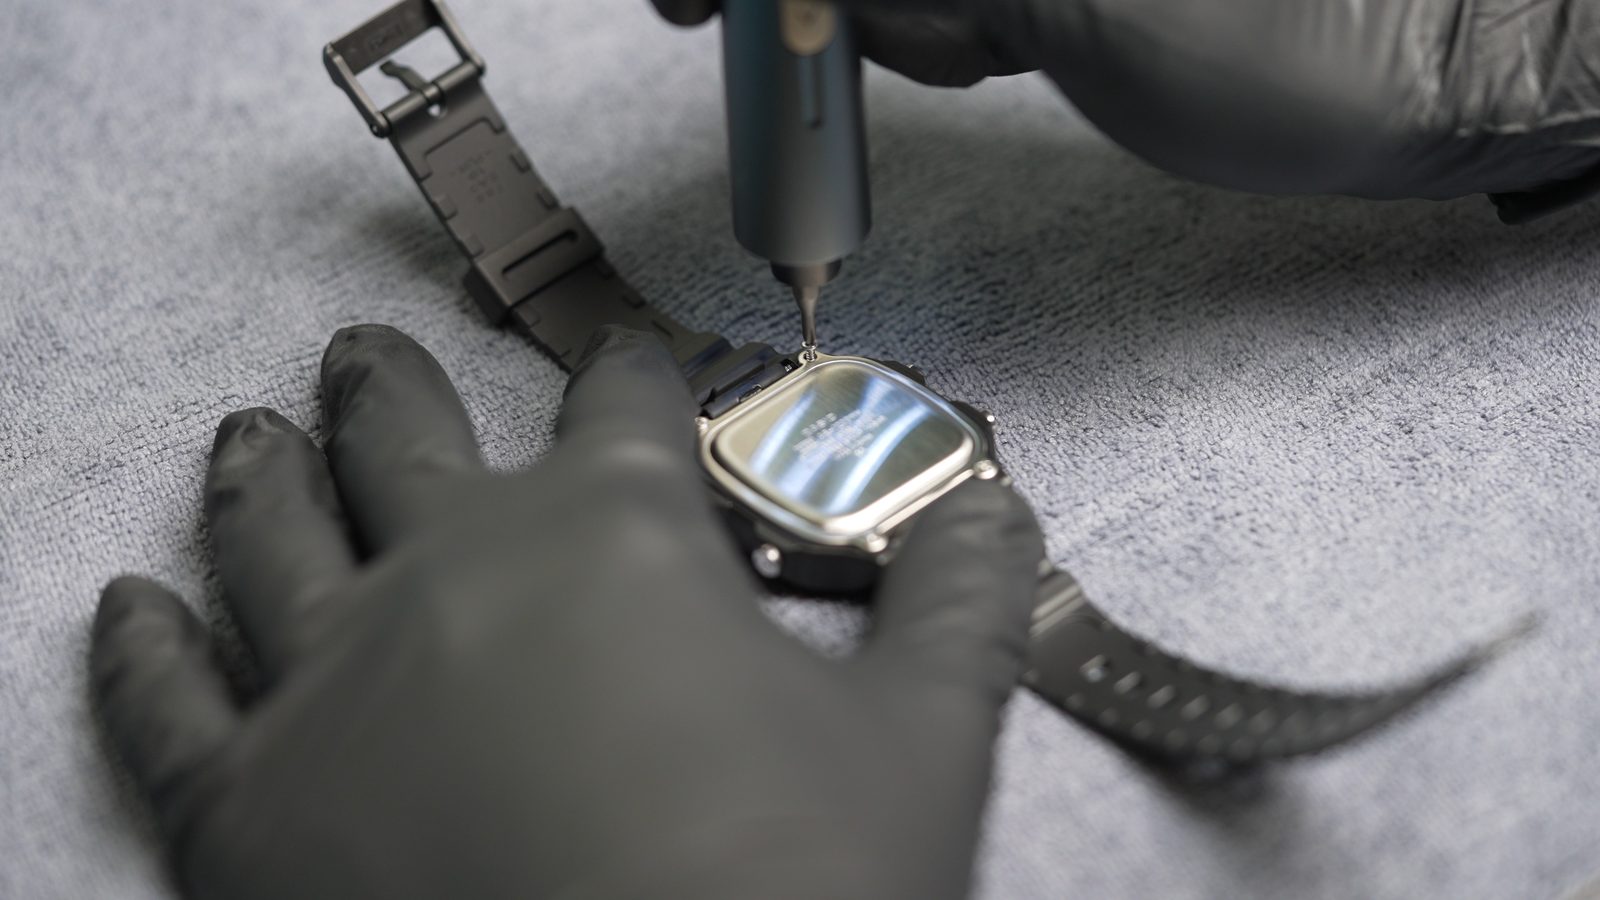
Step 2: Remove the 4 back screws
As you remove them, I recommend placing them in a small tray in order to avoid losing them.
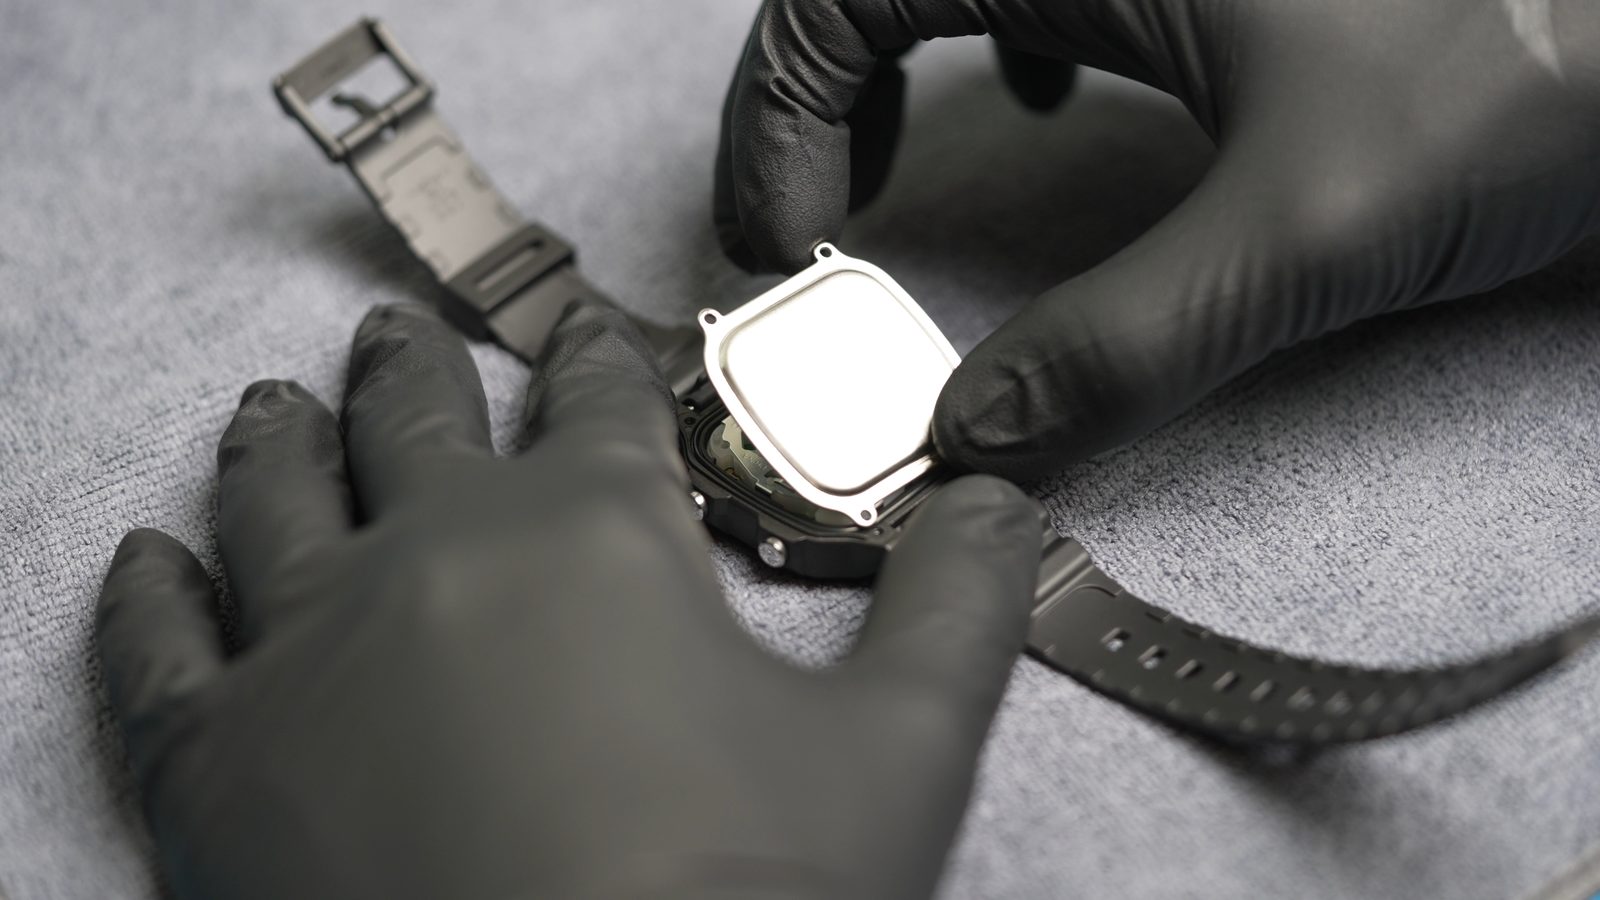
Step 3: Remove the metal backplate
Once all four screws are removed you can lift the backplate off of the watch. There is normally a small amount of resistance, so you can either use your fingernail to get under the corner or a pair of tweezers.
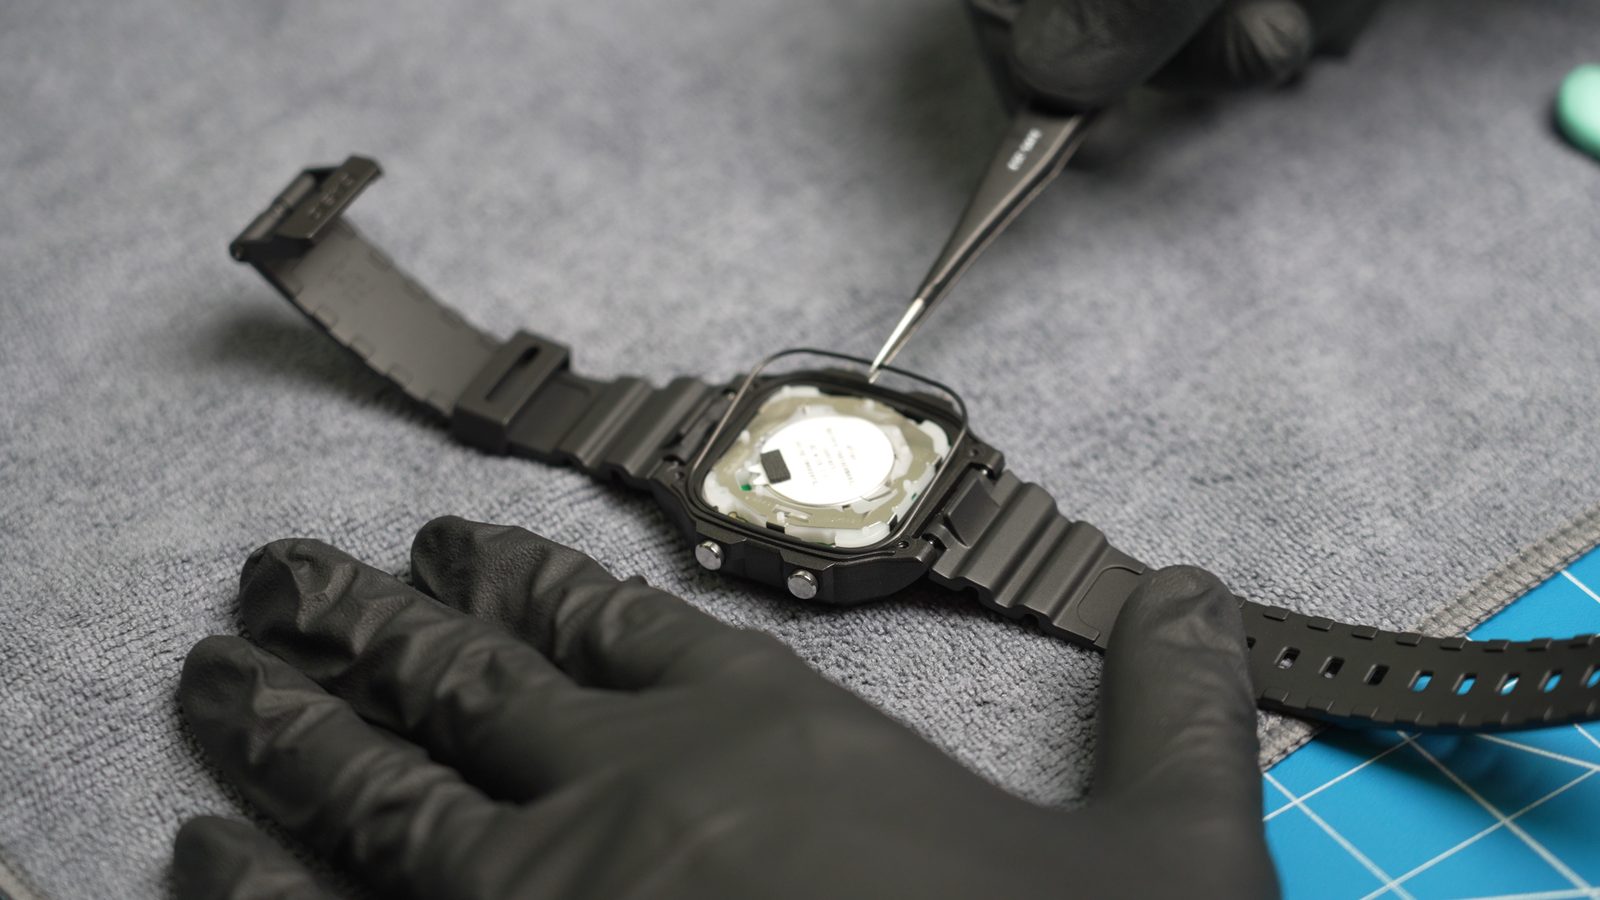
Step 4: Note the rubber waterproofing ring
Once the backplate is removed, you will notice a black rubber ring around the edge of the inside of the case. This ring plus backplate pressure is what is responsible for your watch remaining waterproof. Be careful not to damage it with tweezers or other objects.
Occasionally, this ring will fall out when you remove the backplate. No worries! You will notice a tiny bump on a single outside edge of the black rubber ring. This notch slots into a notch at the 12 o'clock position on the back of the case. Just slot it back in.
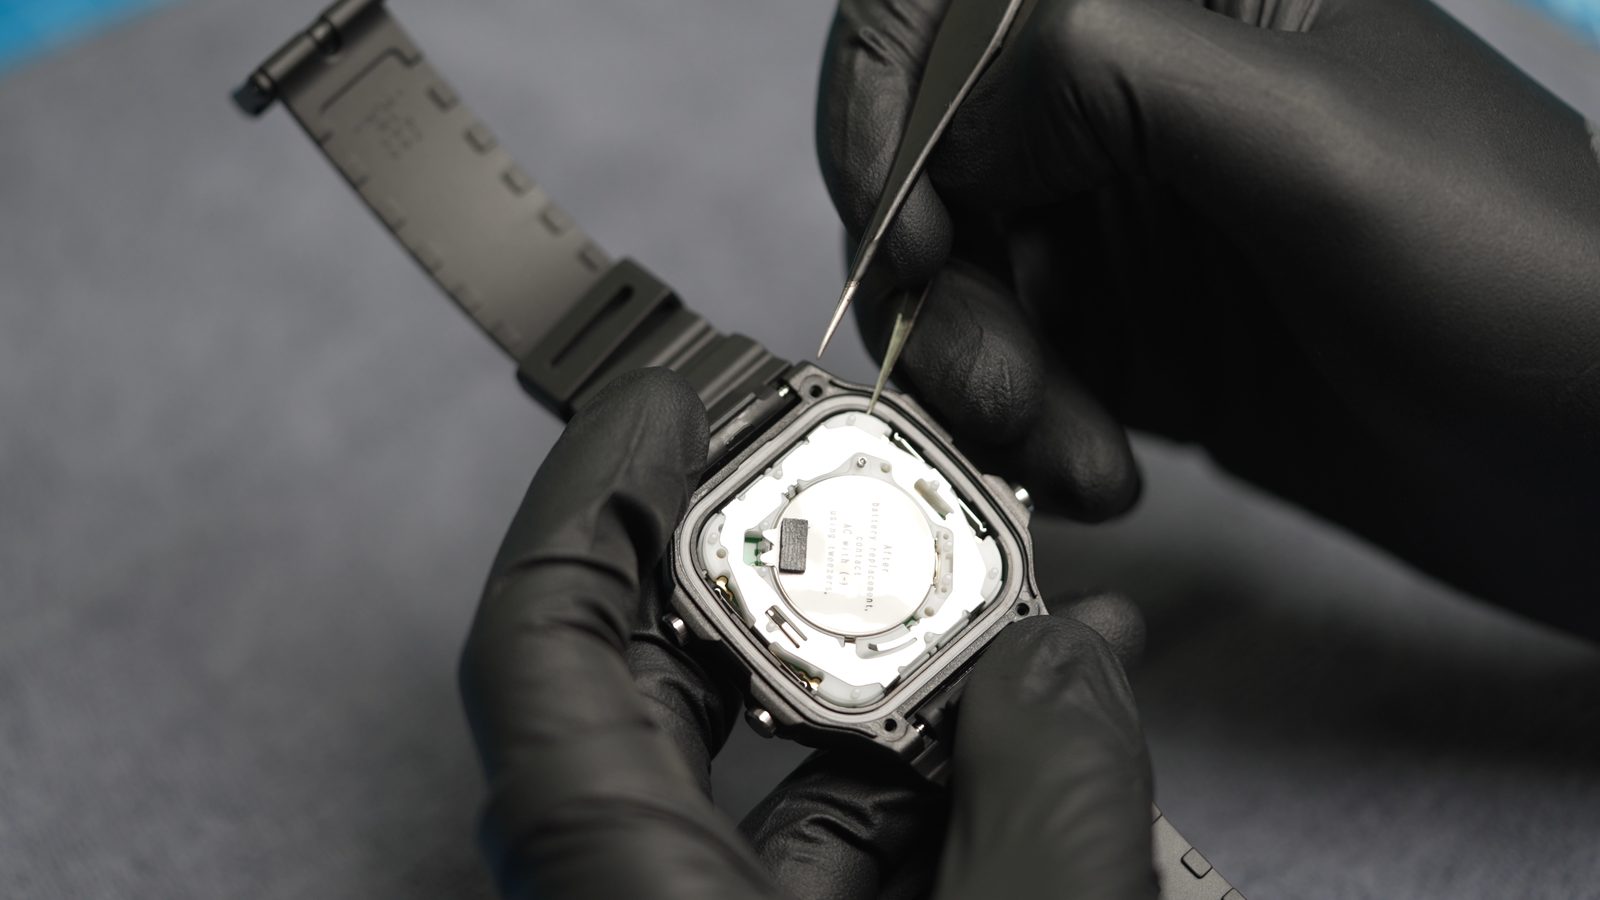
Step 5: Remove the time module
Take your tweezers or something that is rigid with a small point (a fork would likely work) and pry the time module by making contact with a plastic-wrapped corner. I normally use the top right corner. Avoid prying from the button pushers so that you do not bend them.
This will require a decent amount of force. As a general rule, the time module is built like a rock, so you don't need to worry too much about accidentally damaging it. Once done, set the time module aside.
Step 6: Remove the faceplate
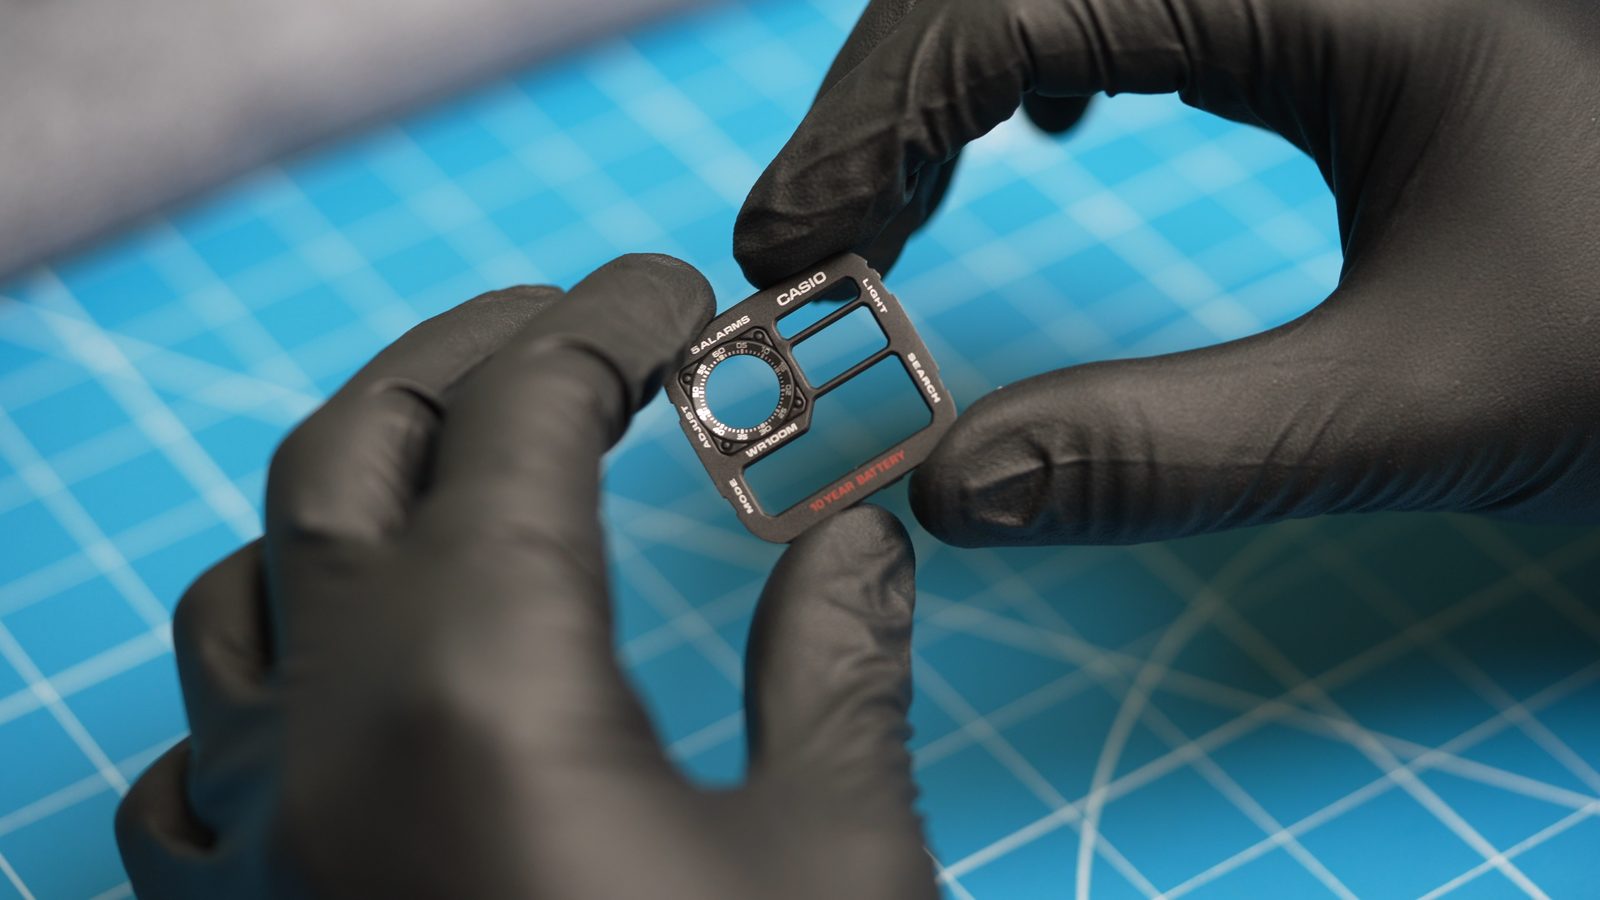
For this step many people try to use the tweezers to remove the faceplate. There isn't a lot of room between the faceplate and the front glass, and it is easy to accidentally scratch the back of the glass. This is something you can't really fix.
To avoid this, simply flip the watch over and give it a good shake. The faceplate will fall out and you can avoid the sketchy tweezer work. If the black rubber waterproofing ring falls out, just refer back to Step 4 for reinstalling it.
Step 7: Tape the faceplate, set the other parts aside
While you work on the faceplate, I like to set the time module back in the case; this will help avoid dust getting into the open case.
Flip the faceplate around so you are dealing with the side with no lettering. We are now going to add our double-sided tape, which will hold the filter in place.
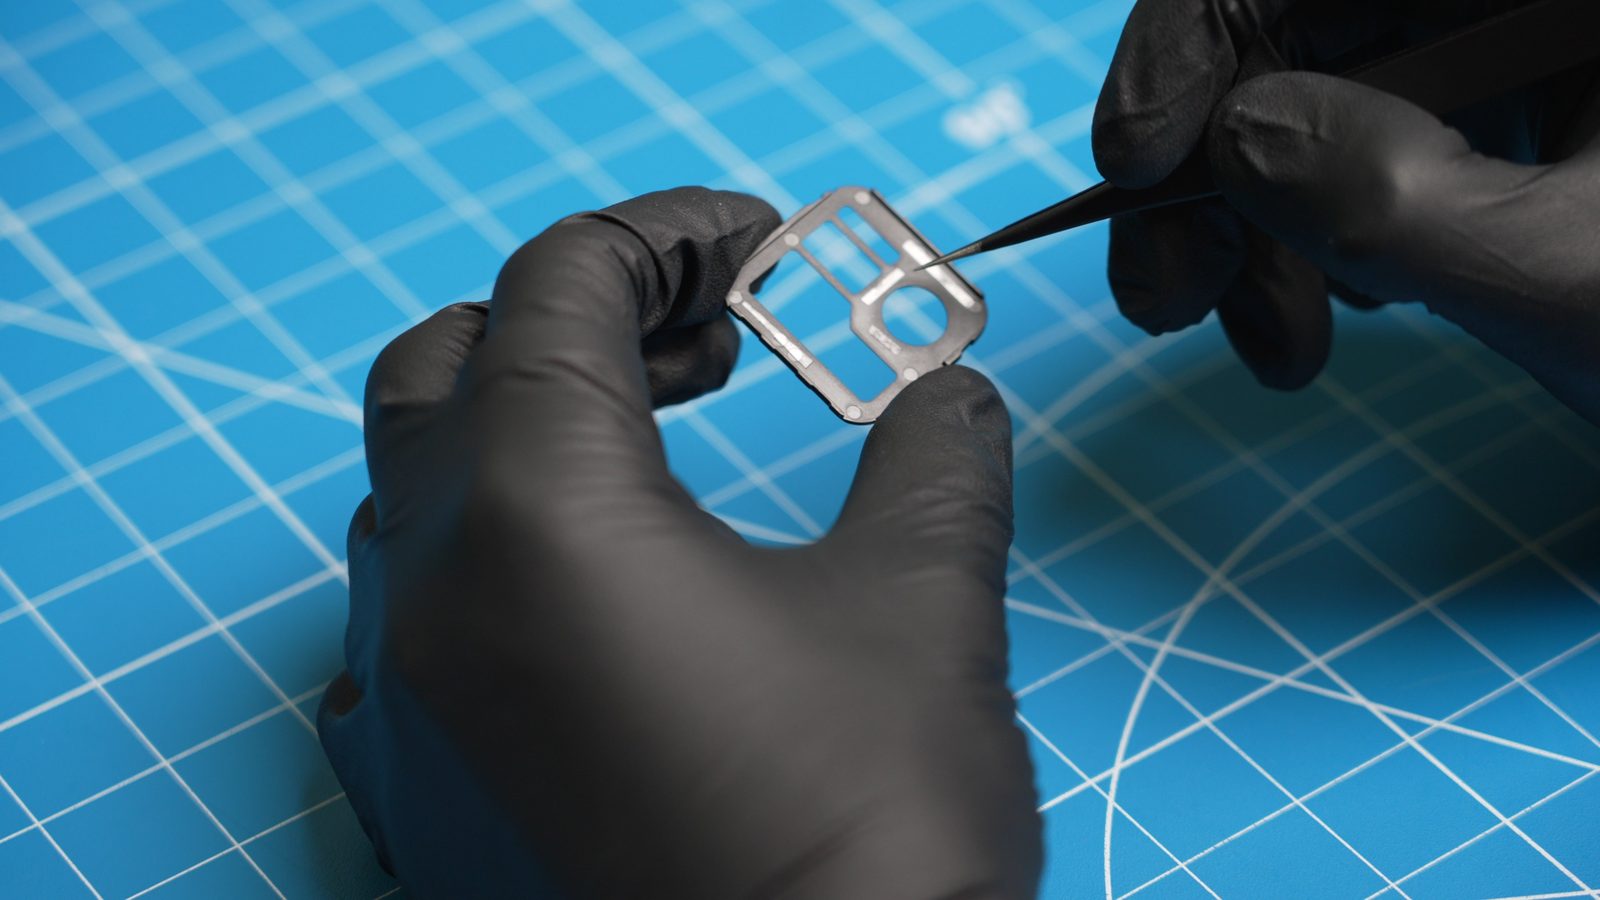
Assuming you are using a single filter which will cover all of the faceplate windows, cut very thin pieces of double-sided tape and apply them in the following four areas, looking at the back of the faceplate:
- Top right, just above the circular window (full width of tape)
- Left of the circular window, right of the smallest mute window and map window (half width of tape)
- Below the circular window, above the right side of the time window (half width of tape)
- Bottom left, below the main time window (full width of tape)
Use the tweezers to place the small pieces of tape. Ensure that the tape is not overhanging any of the windows, as this will show up in the final result.
Tamp the tape down with the tweezers. The color of the tape should change from whitish to black as it adheres to the faceplate.
If you are using multiple filters (multiple colors), especially for the small windows, add additional tape around the edges of any window where a filter will be making contact. This is critical if you have cut small filters for the mute and map windows.
Step 8: Apply the filter to the faceplate
Note: the solid color filters ship with protective film on both sides. The Sunset gradient filter has no film due to its different printing process and goes straight into the watch, so skip the peeling instructions in this step if that's what you're installing.
Remove the protective layer from the front side of the gel filter, and leave the protective layer on the back side for now. This will help avoid dust and scratches.
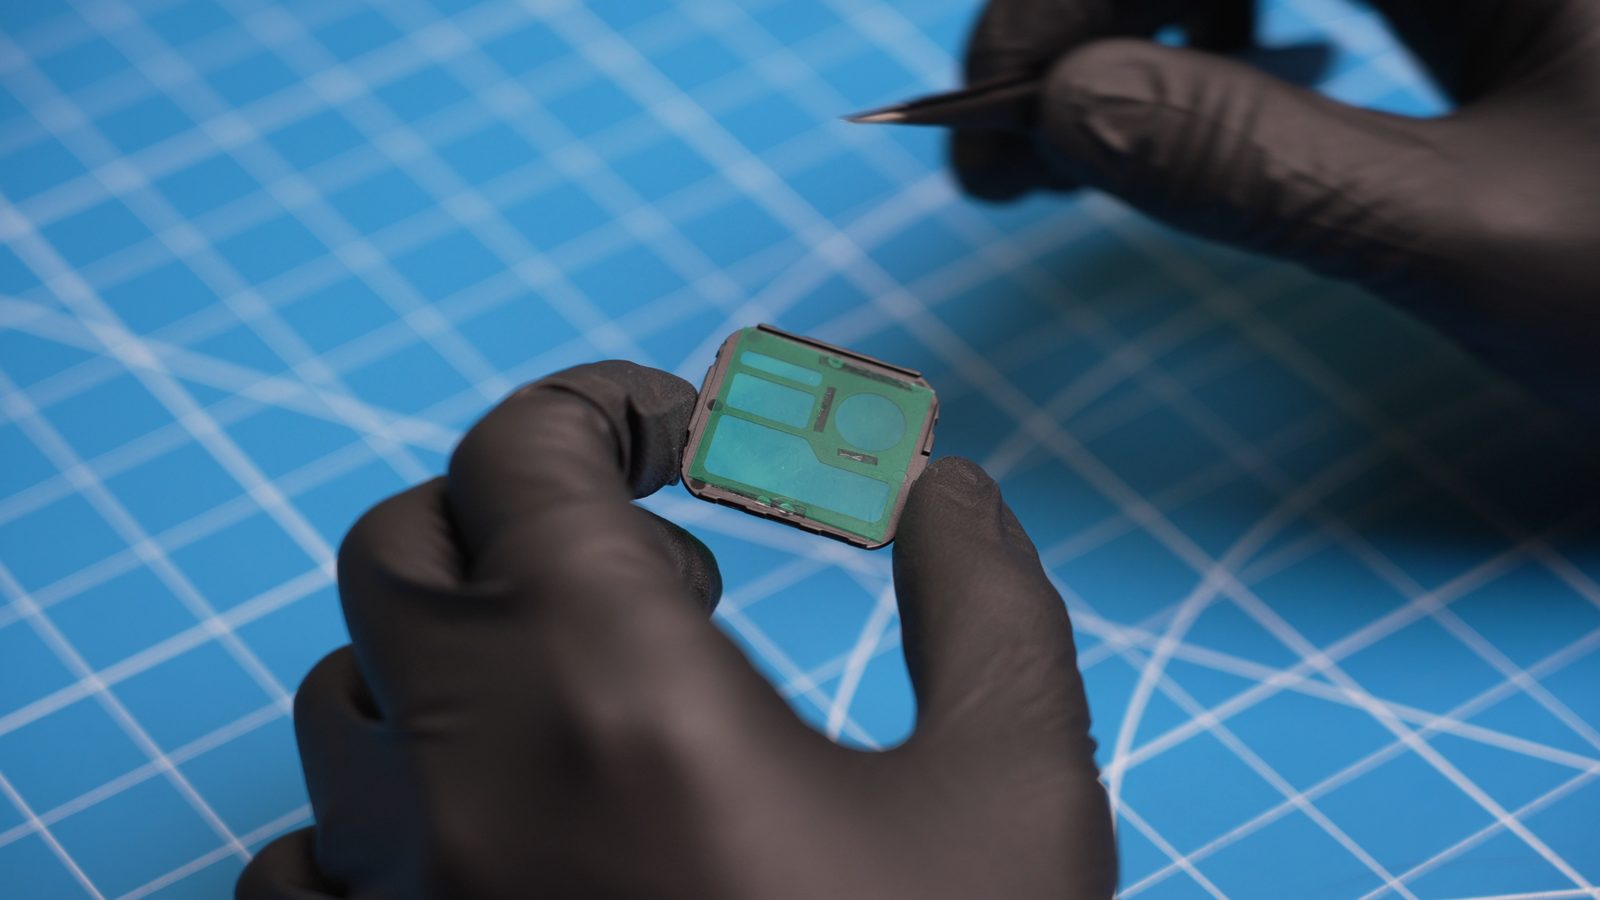
Place the front side of the filter (now facing away from you) onto the back of the faceplate so that it contacts all of the double-sided tape areas that you just applied. Ensure that the filter covers all of the windows and that there are no gaps.
Your placement doesn't have to be perfect as long as all of the windows are covered by the filter. If any of the filter edges are overhanging the four corners of the faceplate, trim the edges with scissors so the filter is within the bounds of the faceplate. This will make sure the faceplate fits back in the case smoothly.
Remove the back protective layer from the filter.
Step 9: Dust removal
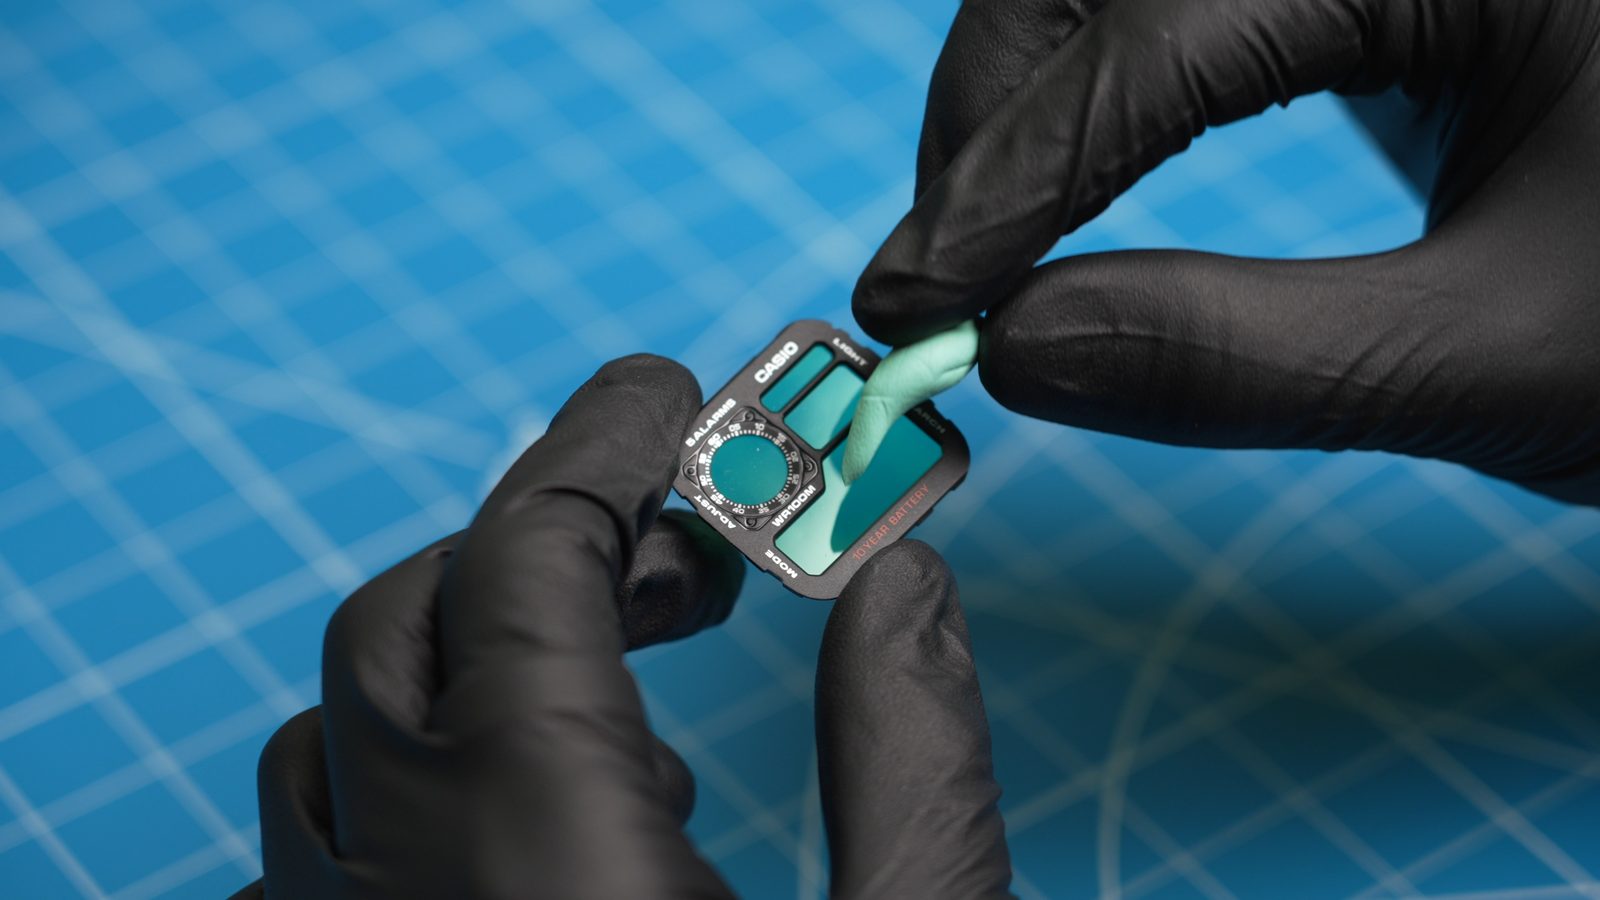
To me, this is the most important step, and where our dust removal putty comes in.
Unless you are working in a dust-free lab, some amount of dust will have accumulated in both the case and on the faceplate/filter. For this I like to have a strong light source nearby, as it will help you spot each piece of dust. Once all of the dust is removed, move quickly on putting the faceplate/filter back into the watch case. The longer you wait, the more time dust has to accumulate again.
I like to start by cutting off a small piece of putty and shaping it with my fingers into a point. You want to use small, deliberate taps with the putty in order to remove each piece of visible dust.
Start by removing dust from the back of the glass in the case. Again, small taps so as to not leave any residue from the putty. It helps if you have a dark background to spot the dust.
Next move onto the faceplate/filter. Once you pick it up, do not put it back down unless you are putting it into the watch case. There is often more dust on surfaces than in the air. Be sure to check the crevices around the circular feature for dust, the front of the faceplate itself, and the edges of each window. Complete the dust removal on both the front and the back.
Step 10: Reassemble the watch
Once the dust has been removed, quickly place the faceplate back into the case. There is a small notch at the top left of the back of the case that the faceplate needs to slot into.
Next, take the time module and push it back into the case with your fingers. At this point I like to flip the watch around, remove the circular protective cover for the glass, and check for any dust one more time before committing to the reassembly. Don't worry, it is not uncommon to spot dust and need to repeat the previous step.
Once you are happy with the dust removal, use the tweezers to make sure each of the four button levers on the right and left sides of the time module are seated behind the button pushers. Typically, two or three levers will be unseated. Pull the levers inward and you should hear a small click as they fall behind the button pushers. The time module should also settle into the case more evenly as the levers are slotted in.
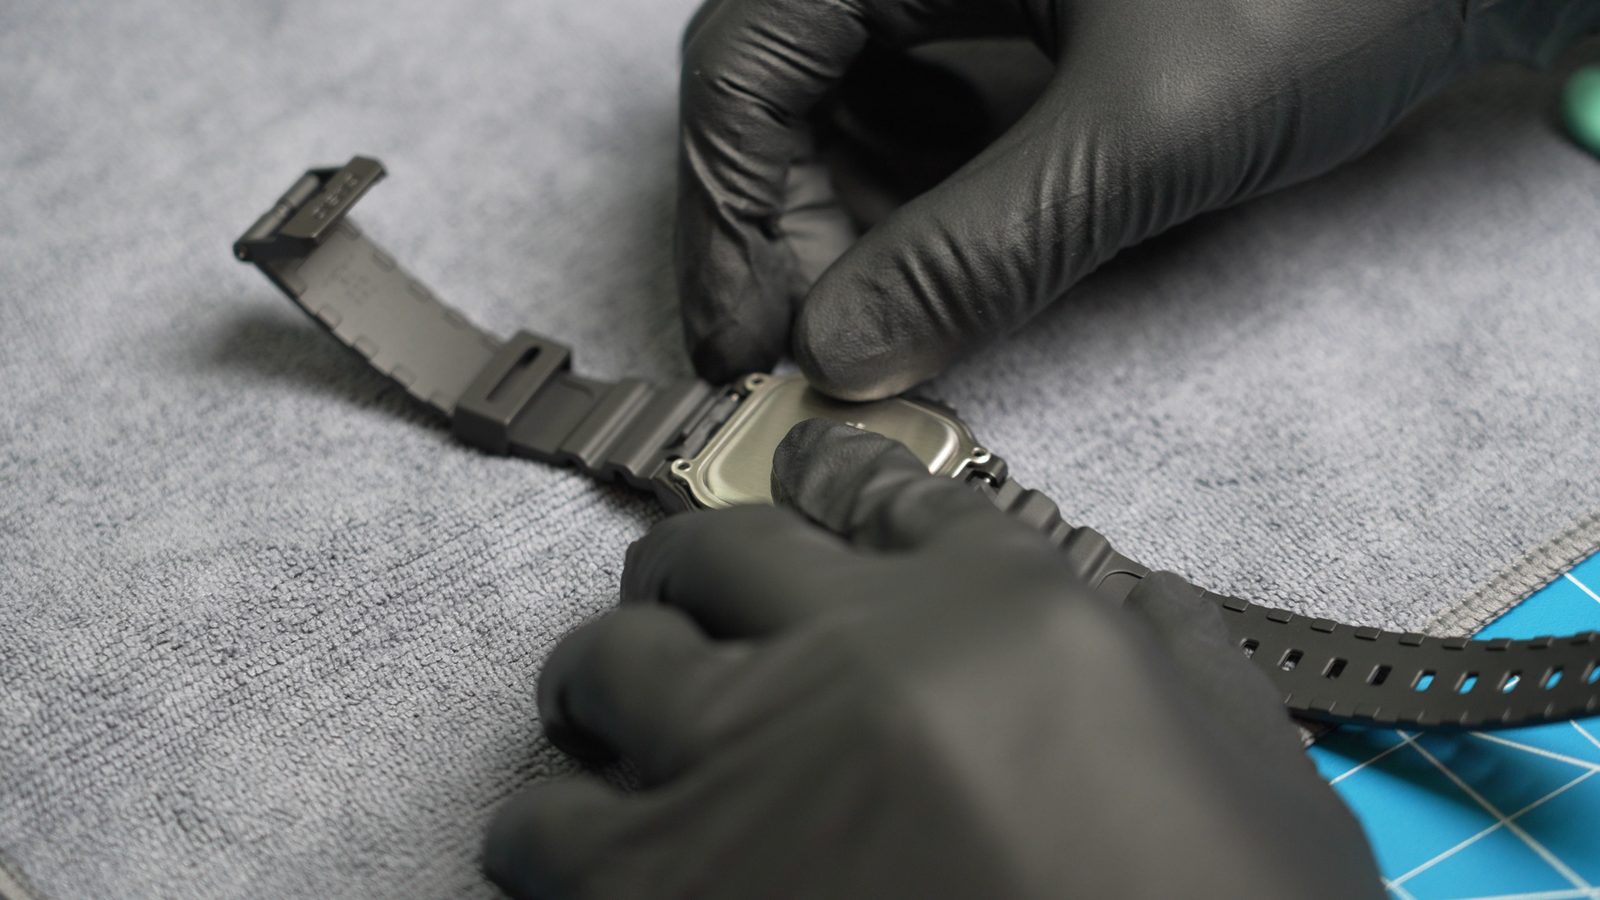
Ensure the black rubber waterproofing ring is still in place, and remove any dust that may be on it. Return the backplate to the watch.
Screw in the four screws. I like to go top right, bottom left, top left, bottom right for an even pressure distribution. Make sure not to overtighten and strip the screws.
Step 11: Test the functions of the watch
Test each of the buttons to ensure everything is properly seated within the watch. If so, congratulations, you have just completed your first Royale mod!
If you want a visual walkthrough, I post a ton of short mod videos on my YouTube channel, LukeBuildsWatches.
Troubleshooting Common AE1200 Mod Problems
Dust specks visible under the filter after reassembly
This is the #1 first-mod outcome, and it happens to everyone. Open the watch back up (four screws, two minutes now that you've done it once), pull the faceplate, and repeat Step 9. The gel filter's advantage is exactly this: dust lifts off with putty and nothing is glued down. A dark background and a strong, low-angle light make specks visible that overhead room lighting hides.
One or more buttons don't click or respond
The button levers on the time module aren't seated behind the button pushers. Reopen the caseback and redo the lever check in Step 10: pull each lever inward until you hear the small click. This fixes it nearly every time; the buttons themselves are very hard to actually break.
Filter edge visible in a window, or faceplate won't seat flat
Either a piece of tape is overhanging a window, or the filter is overhanging the faceplate's corners. Pull the faceplate, trim the offender with scissors, and re-seat. The faceplate should drop into its notch with no pressure.
The black rubber ring fell out and I don't know its orientation
Find the tiny bump on the ring's outside edge and slot it into the matching notch at the 12 o'clock position on the back of the case (Step 4). Never reassemble without the ring seated; that ring plus backplate pressure is the entire water seal.
AE1200 Filter Mod FAQ
Does the filter mod void the AE1200's water resistance?
The seal on this watch is the rubber ring compressed by the backplate, and the mod doesn't touch either one. Reassembled carefully with the ring seated and screws evenly tightened, the watch seals the same way it did from the factory. That said, once any watch has been opened outside a pressure-tested environment, the factory rating is no longer guaranteed, so I treat modded watches as splash-proof rather than swim-proof.
How long does the mod take?
About 30 minutes for a careful first attempt. Most of that is dust removal, which is also the step you shouldn't rush. After a few mods it becomes a 10 to 15 minute job.
Can I undo the mod?
Yes, completely, if you used gel filters and double-sided tape as this guide recommends. Peel the filter and tape off the faceplate and the watch is stock again. This is the main reason I steer people away from super glue and adhesive-backed filters.
Do I need to cut the filter myself?
No. The kits come as single-size 1-inch by 1-inch filters that change the color of the entire screen (three to a kit for solid colors, two for gradients). If you only want to color certain windows, or mix colors across windows, any filter cuts easily to size with a household pair of scissors.
Do these filters work on the AE1300, AE1600 or other Casios?
Yes. The filters are verified on the AE1300 and AE1600 as well as the AE1200, and customers have installed them in a wide variety of other Casio watches; I've never heard of a model they didn't work with. Because they ship as 1-inch by 1-inch sheets, you may need to trim them to fit a different watch's display window.
Which filter colors are most popular?
The Sunset gradient is the bestseller. Among the solid colors, the order runs red, blue, green, orange, purple, neon yellow, pink, neon pink, then yellow. The LCD stays perfectly readable through a single gel layer in normal light.
What's Next
Once you've done one filter mod, the AE1200 opens up: decals, straps, full metal cases. The biggest single upgrade is the full metal case swap, which uses the exact disassembly you just learned. If you want to add a fun flair beyond color, I also make decals for the Royale (sized specifically for the AE1200 display): the moon and the other planets, a nuke symbol, a golf ball and other sports, and flags. Browse the full filters and parts collection, or if you'd rather wear one than build one, the finished custom Royales are built exactly this way.